Building a stainless steel product from the ground up involves a lot of work, technology and science. Even though there are billions of users of stainless steel items around the world, there are very few people (relatively) who know what goes into making a stainless steel product from scratch. The manufacturing process of a stainless steel product is indeed fascinating and it gives you an insight into how far our ability to craft materials has evolved since the early days of the Industrial Revolution. Here are the six most important steps in the manufacturing process of a stainless steel product:
Â
1) Material handling
Uncoiler-A material handling machine located at the beginning of a process line used to hold and safely pay off or uncoil the steel strip. It controls the speed and direction of the strip of metal as it unwinds from the coil and is sent to the line for processing, such as slitting or tube mill entry.
Â
2) Forming
Deep drawing press-Â In the second stage, the semi-finished steel shapes undergo a series of forming operations. For instance, the stainless steel is hot rolled (heated and passed through enormous rolls). The blooms and billets mentioned above are converted to bar and wire. The slabs on the other hand are formed into plates, strips or sheets. It is very common to turn semi-finished steel shapes into bars, as it is the most versatile stainless steel form. The reason why it is versatile is because it comes in all grades and sizes. You have round, squared, octagonal and hexagonal bars, each suitable for a different type of application.
Â
3) Heat Treatment
Annealinf furnaces-Â Up next we have the heat treatment. As the name clearly suggests, the various stainless steel forms undergo a thorough annealing process during this step. Annealing is another name for heat treatment where the stainless steel is heated and cooled in a controlled environment. The purpose of this heat treatment is to relieve the pent up stress inside the stainless steel and soften the material to make it more suitable for a wide variety of applications. The people in charge of carrying out the annealing process have to be very careful about control the conditions as even the slightest of changes in the temperature, pressure, duration or cooling rate could result in a faulty product.
Â
4) Descaling
Pickling-Â During the annealing process, a certain amount of scale appears on the surface of the stainless steel. This scale can be removed using a number of different processes that are collectively known as descaling. Pickling is one of the more common methods of carrying out the descaling process.
Â
5) Cutting and Punching
The semi-finished, heat treated and descaled stainless steel forms are cut into specific shapes in this step. Mechanical cutting is performed with the aid of guillotine knives, blanking, nibbling and high speed blades. And in this step, the tap hole and the over flow will be made.
Â
6) Finishing and Polishing
Polishing machine-Â Finishing is applied to help the stainless steel product achieve its signature aesthetically appealing appearance. Finishes are also needed to make the stainless steel product smooth and easier to clean, which is a top requirement in sanitary applications.
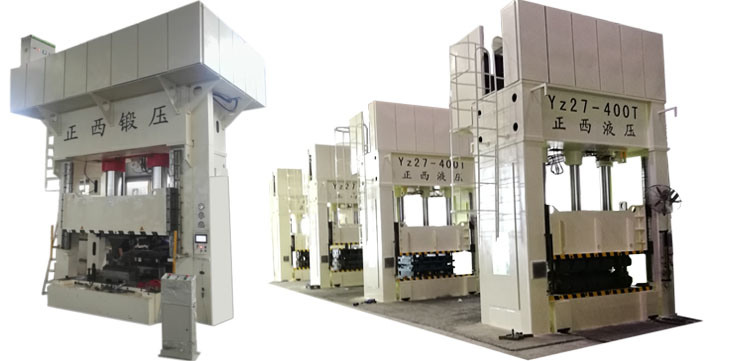
Hydraulic press 4 column hydraulic Sheet metal deep drawing
Features
1.Hydraulic machine that used the hydrostatic pressure to process metal, plastic, rubber, wood, powder and other products .
2. It is commonly used in the pressing process and press forming process, such as: forging, stamping, cold extrusion, straightening, bending, flanging, sheet metal deep drawing, powder metallurgy, press-fit etc.
3.Significant technical and economic advantages in reducing weight, reducing the number of parts and the number of molds, improve the stiffness and strength, reduce production costs, etc.
SPECS of Yz33Â
| Model  | unit | Yz33-25T | Yz33-50T | Yz33-63T | Yz33-100T | Yz33-160T | Yz33-250T | |
| Clamping  Force | KN | 250 | 500 | 630 | 1000 | 1600 | 2500 | |
| Working layer | Qty | 2~4 | 2~4 | 2~4 | 2~4 | 2~4 | 2~4 | |
| Piston stroke | mm | 180 | 250 | 250 | 250/250 | 250/250 | 500 | |
| Heating Platen daylight | mm | 90 | 125 | 125 | 125 | 125 | 125 | |
| Heating Platen Size  |
Left-right | mm | 350 | 400 | 500 | 600 | 750 | 900 |
| Front-back | mm | 350 | 400 | 500 | 600 | 850 | 900 | |
| Heating  plate power | KW | 1.5 | 2.2 | 3 | 7.5 | 11 | 15 | |
| Motor power | KW | 7.2 | 9 | 10.8 | 33.75 | 45 | 45 | |

Â
Certificate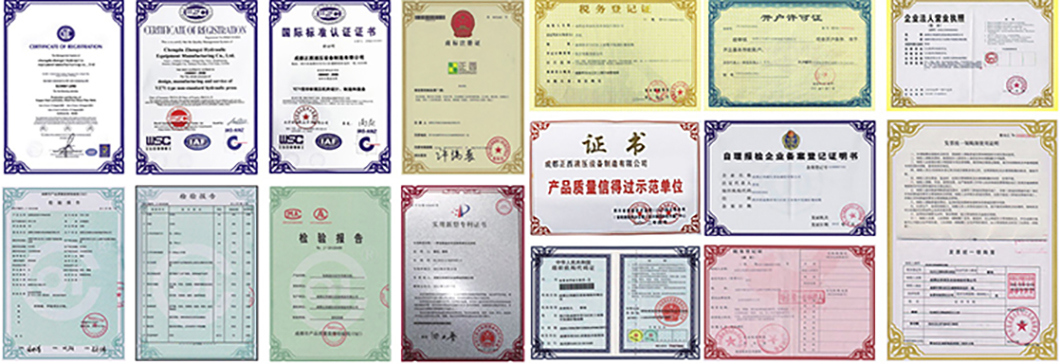

Building a stainless steel product from the ground up involves a lot of work, technology and science. Even though there are billions of users of stainless steel items around the world, there are very few people (relatively) who know what goes into making a stainless steel product from scratch. The manufacturing process of a stainless steel product is indeed fascinating and it gives you an insight into how far our ability to craft materials has evolved since the early days of the Industrial Revolution. Here are the six most important steps in the manufacturing process of a stainless steel product:
Â
1) Material handling
Uncoiler-A material handling machine located at the beginning of a process line used to hold and safely pay off or uncoil the steel strip. It controls the speed and direction of the strip of metal as it unwinds from the coil and is sent to the line for processing, such as slitting or tube mill entry.
Â
2) Forming
Deep drawing press-Â In the second stage, the semi-finished steel shapes undergo a series of forming operations. For instance, the stainless steel is hot rolled (heated and passed through enormous rolls). The blooms and billets mentioned above are converted to bar and wire. The slabs on the other hand are formed into plates, strips or sheets. It is very common to turn semi-finished steel shapes into bars, as it is the most versatile stainless steel form. The reason why it is versatile is because it comes in all grades and sizes. You have round, squared, octagonal and hexagonal bars, each suitable for a different type of application.
Â
3) Heat Treatment
Annealinf furnaces-Â Up next we have the heat treatment. As the name clearly suggests, the various stainless steel forms undergo a thorough annealing process during this step. Annealing is another name for heat treatment where the stainless steel is heated and cooled in a controlled environment. The purpose of this heat treatment is to relieve the pent up stress inside the stainless steel and soften the material to make it more suitable for a wide variety of applications. The people in charge of carrying out the annealing process have to be very careful about control the conditions as even the slightest of changes in the temperature, pressure, duration or cooling rate could result in a faulty product.
Â
4) Descaling
Pickling-Â During the annealing process, a certain amount of scale appears on the surface of the stainless steel. This scale can be removed using a number of different processes that are collectively known as descaling. Pickling is one of the more common methods of carrying out the descaling process.
Â
5) Cutting and Punching
The semi-finished, heat treated and descaled stainless steel forms are cut into specific shapes in this step. Mechanical cutting is performed with the aid of guillotine knives, blanking, nibbling and high speed blades. And in this step, the tap hole and the over flow will be made.
Â
6) Finishing and Polishing
Polishing machine-Â Finishing is applied to help the stainless steel product achieve its signature aesthetically appealing appearance. Finishes are also needed to make the stainless steel product smooth and easier to clean, which is a top requirement in sanitary applications.
Hydraulic press 4 column hydraulic Sheet metal deep drawing
Features
1.Hydraulic machine that used the hydrostatic pressure to process metal, plastic, rubber, wood, powder and other products .
2. It is commonly used in the pressing process and press forming process, such as: forging, stamping, cold extrusion, straightening, bending, flanging, sheet metal deep drawing, powder metallurgy, press-fit etc.
3.Significant technical and economic advantages in reducing weight, reducing the number of parts and the number of molds, improve the stiffness and strength, reduce production costs, etc.
SPECS of Yz33Â
| Model  | unit | Yz33-25T | Yz33-50T | Yz33-63T | Yz33-100T | Yz33-160T | Yz33-250T | |
| Clamping  Force | KN | 250 | 500 | 630 | 1000 | 1600 | 2500 | |
| Working layer | Qty | 2~4 | 2~4 | 2~4 | 2~4 | 2~4 | 2~4 | |
| Piston stroke | mm | 180 | 250 | 250 | 250/250 | 250/250 | 500 | |
| Heating Platen daylight | mm | 90 | 125 | 125 | 125 | 125 | 125 | |
| Heating Platen Size  |
Left-right | mm | 350 | 400 | 500 | 600 | 750 | 900 |
| Front-back | mm | 350 | 400 | 500 | 600 | 850 | 900 | |
| Heating  plate power | KW | 1.5 | 2.2 | 3 | 7.5 | 11 | 15 | |
| Motor power | KW | 7.2 | 9 | 10.8 | 33.75 | 45 | 45 | |


Â
Certificate
PERSONAL PROTECTION
It is essential that the operator and helpers be properly clothed and protected because of the heat, ultra-violet rays, and sparks, produced by the arc welder (See Figure 3). For body protection a pair of fire retardant long sleeved coveralls without cuffs is a good choice. Always avoid clothing with tears, snags, rips, or worn spots as these are easily ignited by sparks. The sleeves and collars should be kept buttoned. The hands should be protected with leather gauntlet gloves. A pair o high top leather shoes, preferably safety shoes, is good protection for the feet. If low shoes are worn the ankles should be protected by fire resistant leggings. Eyes should be protected by transparent goggles if the person wears prescription glasses or safety glasses if not. A welding helmet or hand shield with filter plate and cover plate is mandatory for eye protection from the harmful rays of the arc. The filter plate should be at least shade #10 for general welding up to 200 amps. However, certain operations such as carbon-arc welding and higher current welding operations require darker shades. Never use a helmet if the filter plate or cover lens is cracked or broken. A flame-proof skull cap to protect the hair and head as well as hearing protection in noisy situations is recommended.
Plastic disposable cigarette lighters are very dangerous around heat and flame. It is very important that they not be carried in the pockets while welding. Always provide protection to bystanders or other workers by welding inside a properly screened area, if possible. If unable to work inside a screened area then protection to others should be provided by a portable screen or shield, or by their wearing anti-flash goggles.
SAFE OPERATION OF THE WELDER
It is important that anyone operating an arc welder be instructed on its safe use by a qualified teacher or welder.
Because of their potentially explosive nature, we strongly recommend that no welding, cutting, or hot work be attempted on used drums, barrels, tanks, or other containers under any circumstances.
If possible, work to be welded should be placed on a firebrick surface at a comfortable height. Welding should never be done directly on a concrete floor. Heat from the arc can cause steam to build-up in the floor which could cause an explosion. The welder cables should be positioned so that sparks and molten metal will not fall on them. They should also be kept free of grease and oil and located where they will not be driven over.
Electric welders can kill by electric shock. If the welding operation must be done on steel or other conductive material an insulating mat must be used under the operator. If the welding area is wet or damp or the operator is actively perspiring then he/she should wear rubber gloves under the Welding Gloves.
It is easier and safer to establish an arc on a clean surface than a dirty or rusty one. Therefore, metal should always be thoroughly cleaned by wire brushing or other method prior to welding. When chipping slag or wire brushing the finished bead the operator should always be sure to protect his eyes and body from flying slag and chips. Unused electrodes and electrode stubs should not be left on the floor as they create a slipping hazard. Hot metal should be handled with metal tongs or pliers. When quenching hot metal in water it should be done carefully to prevent painful burns from the escaping steam. Any metal left to cool should be carefully marked "HOT" with a soapstone. When welding is finished for the day or suspended for any length of time electrodes should be removed from the holder. The holder should be placed where no accidental contact could occur, and the welder should be disconnected from the power source.
SAFETY PRECAUTIONS FOR ENGINE POWERED WELDERS
Always operate in an open well-ventilated area or vent the engine exhaust directly outdoors.
Never fuel the engine while running or in the presence of an open flame.
Wipe up spilled fuel immediately and wait for fumes to disperse before starting the engine. *Never remove the radiator pressure cap from liquid cooled engines while they are hot to prevent scalding yourself.
Stop the engine before performing any maintenance or trouble shooting. The ignition system should be disabled to prevent accidental start of the engine.
Keep all guards and shields in place.
Keep hands, hair, and clothing away from moving parts.
FIRST AID
The welding area should always be equipped with a fire blanket and a well stocked first aid kit. It is desirable that one person be trained in first aid to treat the minor injuries that may occur. All injuries, no matter how minor they may seem can become more serious if not properly treated by trained medical personnel.
KEY POINTS TO REMEMBER
Be sure the welder is properly installed and grounded.
Never weld without adequate ventilation.
Take proper precautions to prevent fires.
Protect your entire body with fire retardant clothing, shoes, and gloves.
Wear eye protection at all times.
Weld only in a firesafe area.
Never do any welding, cutting, or hot work on used drums, barrels, tanks, or other containers.
Mark metal "HOT" with a soapstone.
Keep a well stocked first aid kit handy.
Welding Protection,Auto-Darkening Welding Helmet,Welding Gloves,Welding Glasses
Changzhou Edaweld Trading Company Limited , http://www.edaweld.com